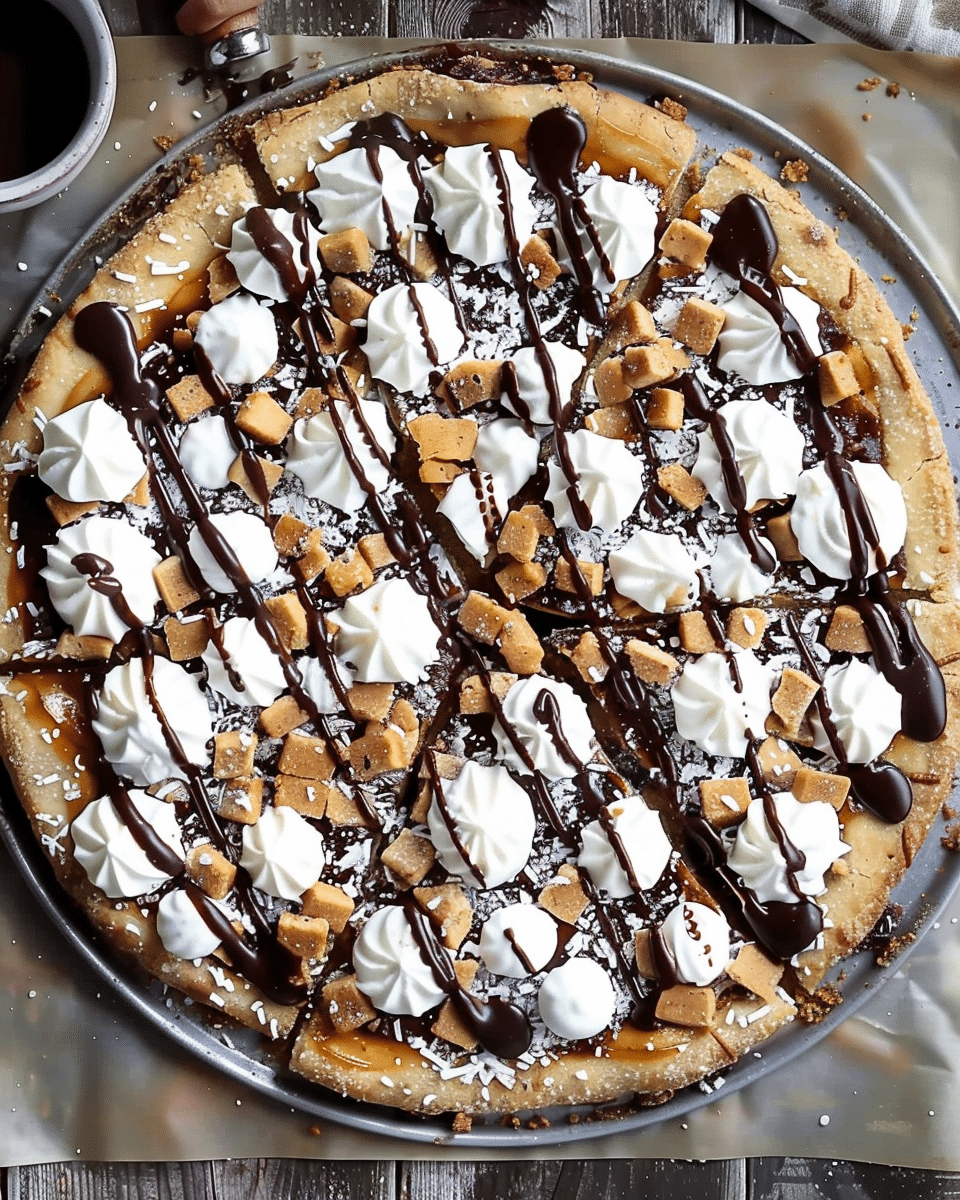
I’ve put together a fun and indulgent dessert that combines the crispiness of a graham‑flavored cookie crust with gooey marshmallows and melted chocolate—baked just like a pizza for shareable dessert fun.
Why You’ll Love This Recipe
I adore this recipe because it turns snack time into a playful dessert moment. I get the nostalgia of campfire s’mores without the fuss of building a fire, and the “pizza” format makes it perfect for sharing. The buttery graham cookie base is sturdy yet tender, while the warm chocolate and toasty marshmallows bring that gooey comfort that’s impossible to resist.
ingredients
(Tip: You’ll find the full list of ingredients and measurements in the recipe card below.)
For the cookie crust:
1 1/3 cups all‑purpose flour
1/4 tsp baking soda
3/4 cup graham cracker crumbs (from about 7 sheets)
1/2 cup salted butter, softened
1/4 cup packed brown sugar
1/2 cup white sugar
1/2 tsp kosher salt
1 large egg, at room temperature
1 tsp vanilla extract
For the toppings:
1/2 cup additional graham cracker crumbs (from about 2 sheets)
1 1/4 cups milk chocolate chips, divided
2 1/2 cups mini marshmallows
Chocolate sauce for drizzling (optional)
directions
I begin by preheating the oven to 350 °F (175 °C) and preparing a 13‑inch deep‑dish pizza pan with nonstick spray to make removal easy. Then, in a medium bowl I whisk together the flour, baking soda, and 3/4 cup graham cracker crumbs until evenly combined. Meanwhile, in the stand mixer fitted with the paddle attachment, I cream the softened butter, brown sugar, white sugar, and kosher salt until the mixture becomes light and fluffy. I slowly add the egg and vanilla, beating until creamy, then gradually incorporate the dry ingredients until a cohesive dough forms.
I press the dough firmly into the bottom of the prepared pan using my hands to create an even layer, then use a fork to pierce it about 20–25 times—this prevents puffing during baking. I bake the crust for 8 to 10 minutes, checking early to ensure it stays tender and lightly browned.
As soon as the crust comes out of the oven, I sprinkle 1 cup of the milk chocolate chips across the top, leaving a small rim to mimic a “crust.” I let the residual heat soften the chips for about 3 to 4 minutes, then gently spread the melted chocolate with a spoon to create a smooth “sauce.” Next, I sprinkle the remaining 1/4 cup graham crumbs, scatter the mini marshmallows evenly, and finish with the remaining 1/4 cup chocolate chips.
I move the pan under the broiler on high for just 1 to 3 minutes—watching carefully—until the marshmallows turn golden and toasty. Finally, I remove it from the oven, optionally drizzle with chocolate sauce for extra decadence, allow it to cool briefly, then slice and serve warm.
Servings and timing
I typically serve this dessert to about 8 people—depending on slice size—perfect for parties or family gatherings. The prep time is around 15 minutes, bake time for the crust is 8–10 minutes, and the topping assembly plus broiling takes another 5 minutes, so total time is about 25 to 30 minutes from start to finish.
storage/reheating
I store leftovers loosely covered at room temperature or in an airtight container for up to 1 day, though it’s best enjoyed fresh and warm. To reheat, I pop slices in a preheated 350 °F (175 °C) oven for 5 minutes or until the marshmallows puff and the chocolate softens—if I’m in a hurry, a few seconds in the microwave also works to revive that gooey goodness.
FAQs
Can I use a regular pizza pan instead of a deep‑dish one?
I’ve used both, but I prefer deep‑dish—it gives a thicker, more cookie‑like base. A regular pan is fine, though I might reduce baking time slightly to avoid over‑crisping.
Can I use dark or semi‑sweet chocolate instead of milk chocolate?
Absolutely—I sometimes use semi‑sweet for a richer contrast with the sweet marshmallows, or even chopped chocolate bars for varied texture—I love experimenting.
Are there substitutions for the marshmallows?
Yes—I’ve used mini caramel bits or even chopped soft caramels for a different kind of chew. Just adjust the broiling time accordingly to prevent burning.
Could I make this ahead of time?
I prefer to make it fresh, but I’ve assembled it and kept it refrigerated—then reheat in a 350 °F oven to revive the textures. The crust gets firmer once chilled, so letting it sit out briefly helps before cutting.
Is the graham‑cracker‑crumb crust gluten‑free?
Not as written, since the graham crumbs and flour contain gluten. I’ve made it gluten‑free by using gluten‑free flour and certified GF graham crumbs—still works beautifully.
How do I prevent the marshmallows from burning under the broiler?
I stay right by the oven and keep the broiler on high for just 1 to 3 minutes—the moment I see golden edges, I pull it out. Trust me, you want to watch closely!
Can I skip the fork‑piercing step?
I don’t recommend it—I tried skipping it once and ended up with a puffed, uneven crust. Those little tines do help maintain a nice flat surface.
What can I use instead of graham cracker crumbs?
I’ve substituted crushed digestive biscuits or shortbread cookies in a pinch—just crush finely and use the same measure for a similar flavor.
Can I drizzle with something other than chocolate sauce?
Yes—I’ve tried caramel drizzle, dulce de leche, or even a salted caramel tahini drizzle—each adds its own delicious twist.
Is it okay to double the recipe for a larger crowd?
Definitely—I’ve made it in a 15‑inch pan by doubling ingredients. Just keep an eye on bake time; it may take a minute or two longer for the crust to set evenly.
Conclusion
I love how this dessert “pizza” brings that nostalgic, cozy campfire feeling right into my kitchen with minimal fuss. The graham cookie base gives structure, the chocolate melts heavenly, and the toasted marshmallows add that irresistible gooey bite. It’s a fun, shareable treat that always disappears fast—and I hope it becomes a favorite in my servings and yours.
Print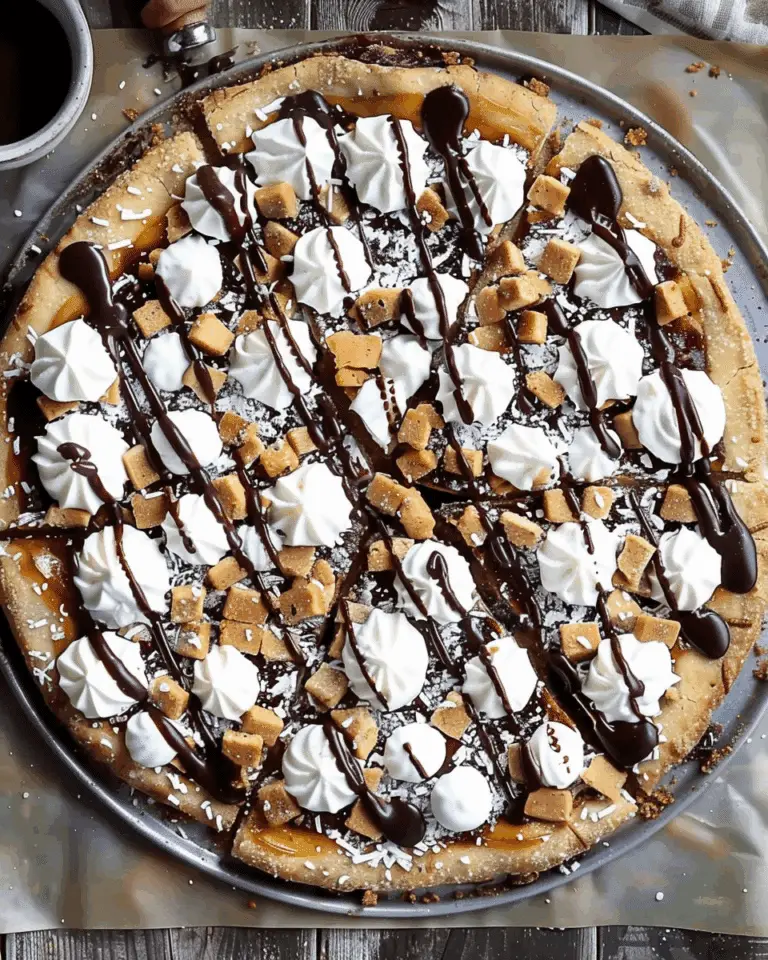
irresistible Graham‑Cookie Dessert “Pizza”
This gooey S’mores Cookie Pizza combines all the classic flavors of your favorite campfire treat into one epic dessert. A chewy graham cracker cookie crust is topped with melted milk chocolate, toasted mini marshmallows, and extra graham crumbs.
- Total Time: 25 minutes
- Yield: 10–12 slices
Ingredients
For the cookie crust:
1 1/3 cups all-purpose flour
1/4 tsp baking soda
3/4 cup graham cracker crumbs (from about 7 sheets)
1/2 cup salted butter, softened
1/4 cup packed brown sugar
1/2 cup white sugar
1/2 tsp kosher salt
1 large egg, at room temperature
1 tsp vanilla extract
For the toppings:
1/2 cup additional graham cracker crumbs (from about 2 sheets)
1 1/4 cups milk chocolate chips, divided
2 1/2 cups mini marshmallows
Chocolate sauce for drizzling (optional)
Instructions
Prepare the Oven and Pan
Preheat oven to 350°F (175°C). Spray a 13-inch deep-dish pizza pan with nonstick spray and set aside.
Make the Graham Cookie Dough
In a bowl, whisk together flour, baking soda, and 3/4 cup graham cracker crumbs. In a stand mixer, cream butter, brown sugar, white sugar, and salt until fluffy. Beat in egg and vanilla. Gradually mix in the dry ingredients to form a dough.
Form and Bake the Cookie Crust
Press the dough evenly into the prepared pan. Prick all over with a fork (20–25 times). Bake for 8–10 minutes, or until lightly golden.
Add and Melt the Chocolate Layer
Immediately sprinkle 1 cup of chocolate chips over the hot crust. Let sit for 3–4 minutes to soften, then spread gently to mimic “pizza sauce.”
Top with Graham, Marshmallows, and More Chocolate
Sprinkle 1/4 cup graham cracker crumbs, followed by mini marshmallows and remaining 1/4 cup chocolate chips.
Broil Until Marshmallows Are Golden
Broil on high for 1–3 minutes until the marshmallows are toasty and golden. Watch closely to prevent burning.
Finish and Serve
Optionally drizzle with chocolate sauce. Let cool slightly, then slice and enjoy warm.
Notes
Use high-quality chocolate for the best flavor.
Watch broiler time carefully; marshmallows can brown quickly.
Store leftovers in an airtight container at room temperature for up to 2 days.
- Prep Time: 15 minutes
- Cook Time: 10 minutes
- Category: Dessert
- Method: baked
- Cuisine: American
- Diet: Vegetarian

